Preorders open until July 31, limited to 1,000 units · Deliveries staggered across September/October, in order of purchase. Shop Preorders open until July 31, limited to 1,000 units · Deliveries staggered across September/October, in order of purchase. Shop
FR · EN · ES
The Roller does not encourage any consumption. It is designed within a legal framework of precision craftsmanship for making botanical cones.
The 3D Corner

The 3D Corner.

Behind the scenes. Inside every box: dozens of parts printed one by one, long hours of machine time, plenty of handwork. Unfiltered, with the numbers to back it up.

New to 3D or an expert, this is written for you: the real numbers first, then how it all gets printed, what I keep — and everything that will improve with professional machines, in a real workshop.

The numbers first

Everything that goes into a single box.

You think you're getting “a Roller”. In reality, a complete box is 39, 57 or 60 parts depending on the model — each with its own time, material and prep. Everything is documented to the minute and to the gram:

For one box… 🧩 Printed parts ⏱️ Printing (machine) 📦 Raw material ✅ Weight received ✋ Prep work 🔧 Assembly
Original Box 39 parts ≈ 29 h 30 min ≈ 333 g ≈ 278 g ≈ 2 h 15 min ≈ 50 min
Premium Box 57 parts ≈ 31 h 00 min ≈ 349 g ≈ 280 g ≈ 3 h 20 min ≈ 1 h 25 min
Premium Max Box 60 parts ≈ 36 h 00 min ≈ 430 g ≈ 368 g ≈ 3 h 30 min ≈ 1 h 30 min

In plain terms: a Premium Box is more than a full day of non-stop printing + nearly 5 h of handwork (prep, then assembly). In 24 h, one machine produces less than one complete box — hence the ten or so machines needed to deliver 1,000 orders.

The real cost

The material, the electricity — and everything lost along the way.

The most surprising part: the gap between what you receive and what I print. The net material (your parts) is never the raw material — for a few useful grams, the machine prints far more.

The material cost

PETG for the structures, TPU for the flexible rods: quality technical material, bought on spools. ≈ 333 g to ≈ 430 g of raw material per box.

The electricity cost

The machines run day and night: 30 to 36 h per box, plus heating the build plate and the nozzle. Power drawn around the clock — a very real cost line. (No figure until I've measured it properly.)

The total material printed

You receive ≈ 280 g of finished parts, but I print ≈ 349 g: the difference goes into supports and color purges. Far more gets printed than what ends up in your box.

In practice: on a Premium Box, nearly 70 g out of 349 g never reach you — yet they were printed, heated, paid for. It comes with 3D printing… but nothing gets thrown away (see “the scraps I keep” further down). The new machine fleet funded by the campaign aims precisely at shrinking that surplus.

15–20%of failed prints

And what nobody counts: the failures.

One line missing from the table: failed prints. My current machines are highly sensitive to humidity and temperature (of the filaments and of the room alike). Depending on the day, the same file doesn't behave the same way.

The critical moment is the first layer: it determines everything that follows. I have to watch it on every print — hence 15 to 20% of failures today.

A failure at the start is no big deal: I just restart. But on the last layer, after hours of machine time, it's genuinely frustrating. Those failures add to the raw material — and it's exactly what I want to bring close to zero with my future setup.
Every box is a real piece of the workshop — hours of machine time and handwork, at a launch price that won't come back.

Choose my box · from €29 Notify me at launch
On video

Printed from start to finish.

To picture it properly, two prints in time-lapse: from empty build plate to finished part, built up layer by layer. And for each one, the real numbers from that print.

The Support Clamp

The large part that clamps the support to hold it perfectly in place during preparation. It prints as a single piece, with no assembly: no glue, no screws — the precision is in the print itself.

Actual print: 0.96 g of part + 0.16 g of supports (1.11 g total) · 15 min 19 s, including 8 min 38 s of printing.

The lid of a Premium Roller

The upper part of the Premium Roller, also printed in full — three hours of machine time condensed into about thirty seconds. A part you actually see: it has to look clean at first glance.

Actual print: 26.44 g of part + 11.23 g of supports — nearly 30% of the weight goes into supports · 3 h 03 min in total.
On video

The loss from color changes: the “droppings”.

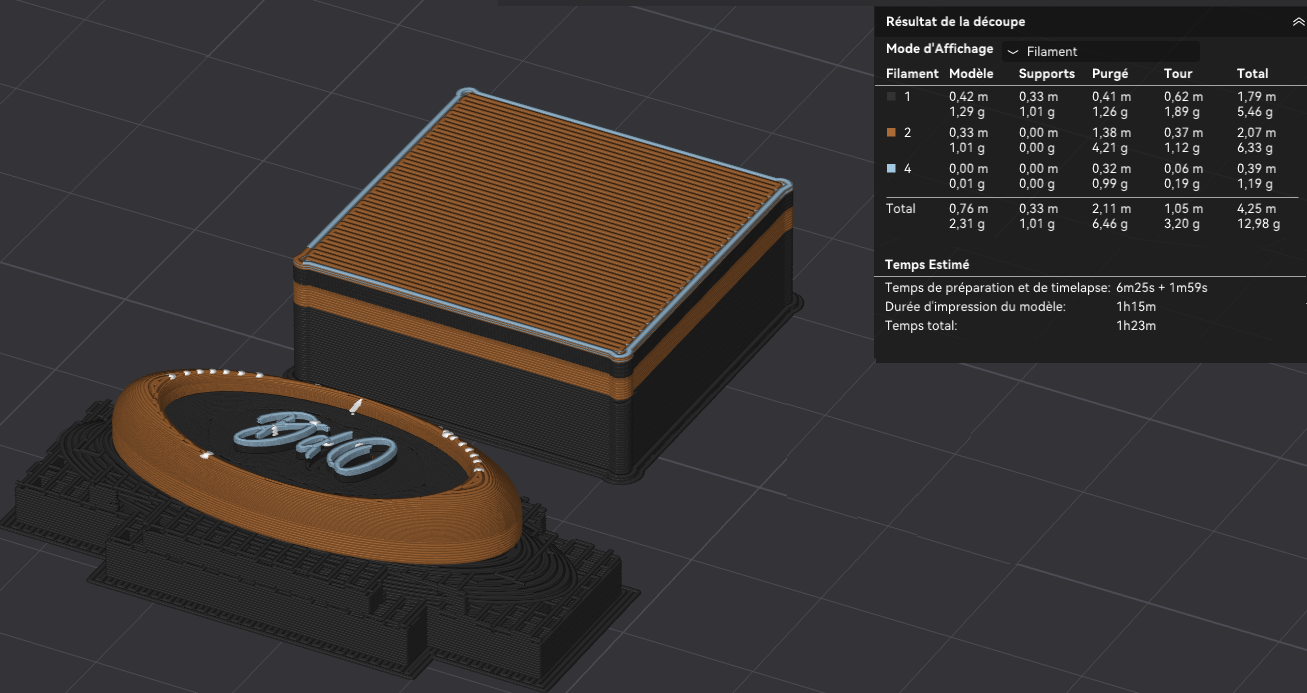
At every color change, the printer has to purge its nozzle: it extrudes a bit of the old shade to make room for the new one. The result: little multicolored purge blobs — the “droppings”. Unavoidable, but it adds up to grams at every transition.

The cap in 3 colors in the slicer software: 12.98 g including 6.46 g purged, in 1 h 23 min
In 3 colors: 12.98 g — including 6.46 g purged — in 1 h 23 min.
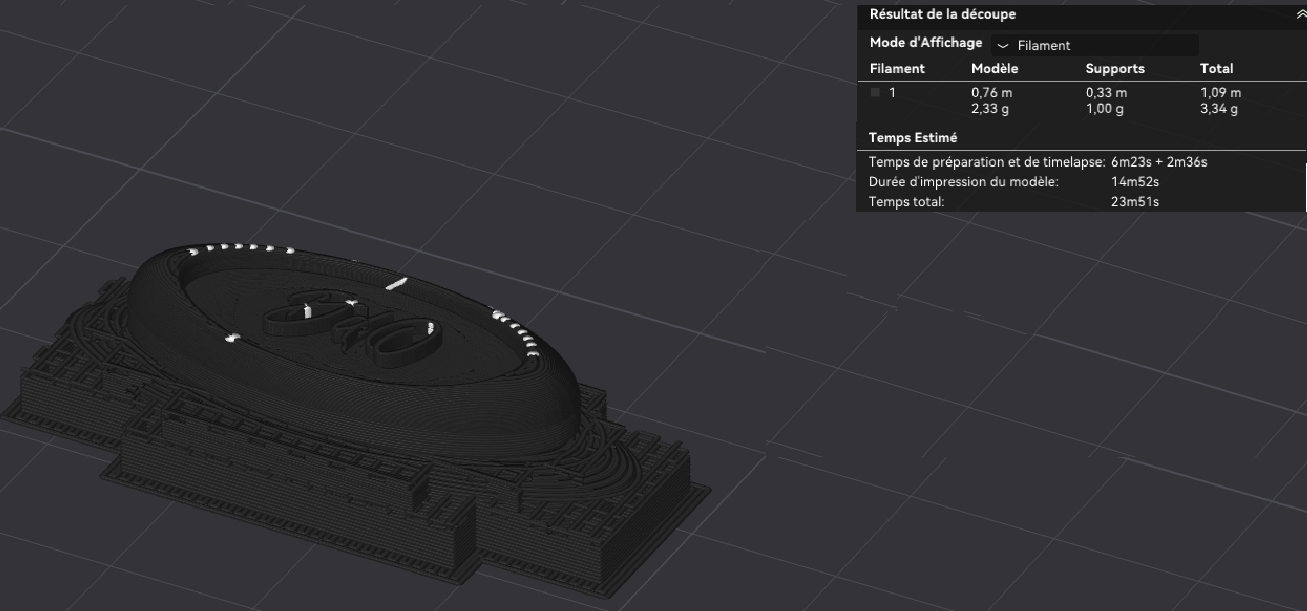
The same cap in a single color: 3.34 g, in 24 minutes
In 1 color: 3.34 g, in 24 min.

The clearest example: the humidifier cap, a 2.3 g part printed in 3 colors.

One color: 3.34 g of material · 24 min.  ↔  Three colors: 12.98 g · 1 h 23 min — including 6.46 g lost to purges, half the total, for the same part.

On a multicolor box, those purges add up: they account for a big share of the gap between raw and net material. Nothing gets thrown away here — those blobs join the stock I keep (further down).

And tomorrow? Professional multi-nozzle machines keep one nozzle per color: almost no purging between shades — the “droppings” melt away.

On video

The loss and complications caused by supports.

A printer builds layer by layer, from the bottom up — there's no way to lay down material “in thin air”. As soon as a shape overhangs, the machine prints temporary supports underneath: walls holding up a roof. And for tall, thin parts, they act as scaffolding. Hence the rules I set for myself to print as precisely as possible — a chosen print orientation, crutches to remove afterwards. Two tricky examples:

01

The supports of the Roller's lid

The lid is built standing upright, layer by layer. That orientation is what serves the internal mechanism: the precision and strength needed so that the rods, once inserted, are perfectly aligned.

To picture it: just as a wall is stronger when the bricks are stacked the right way, a part printed upright holds up better to daily use. Above all, it keeps shapes from flattening: printed horizontally, round shapes would tend to turn oval.
Technical side: orientation chosen to align the layer lines with the main stresses and preserve the internal functional geometry — a deliberate strength / precision trade-off.
02

The rods, printed vertically

The rods print standing up: the only orientation that guarantees their consistency. A double difficulty — they are thin and tall, and made of flexible filament, a material that's awkward to support and really doesn't like being printed upright.

To picture it: it's a bit like putting up a tower with marshmallow scaffolding — you have to build tall and thin, with a soft material that bends under its own weight. The whole challenge is keeping it perfectly straight, layer after layer.
Technical side: printed upright, the rods are consistent all the way around and hold up better when they bend; printed lying down, their surface and strength would suffer exactly where they work hardest. On top of that, multi-nozzle machines would allow rigid supports in a different material from the part — a much cleaner release than with my current machine.
Working the material

Parts I shape by hand — the tongues.

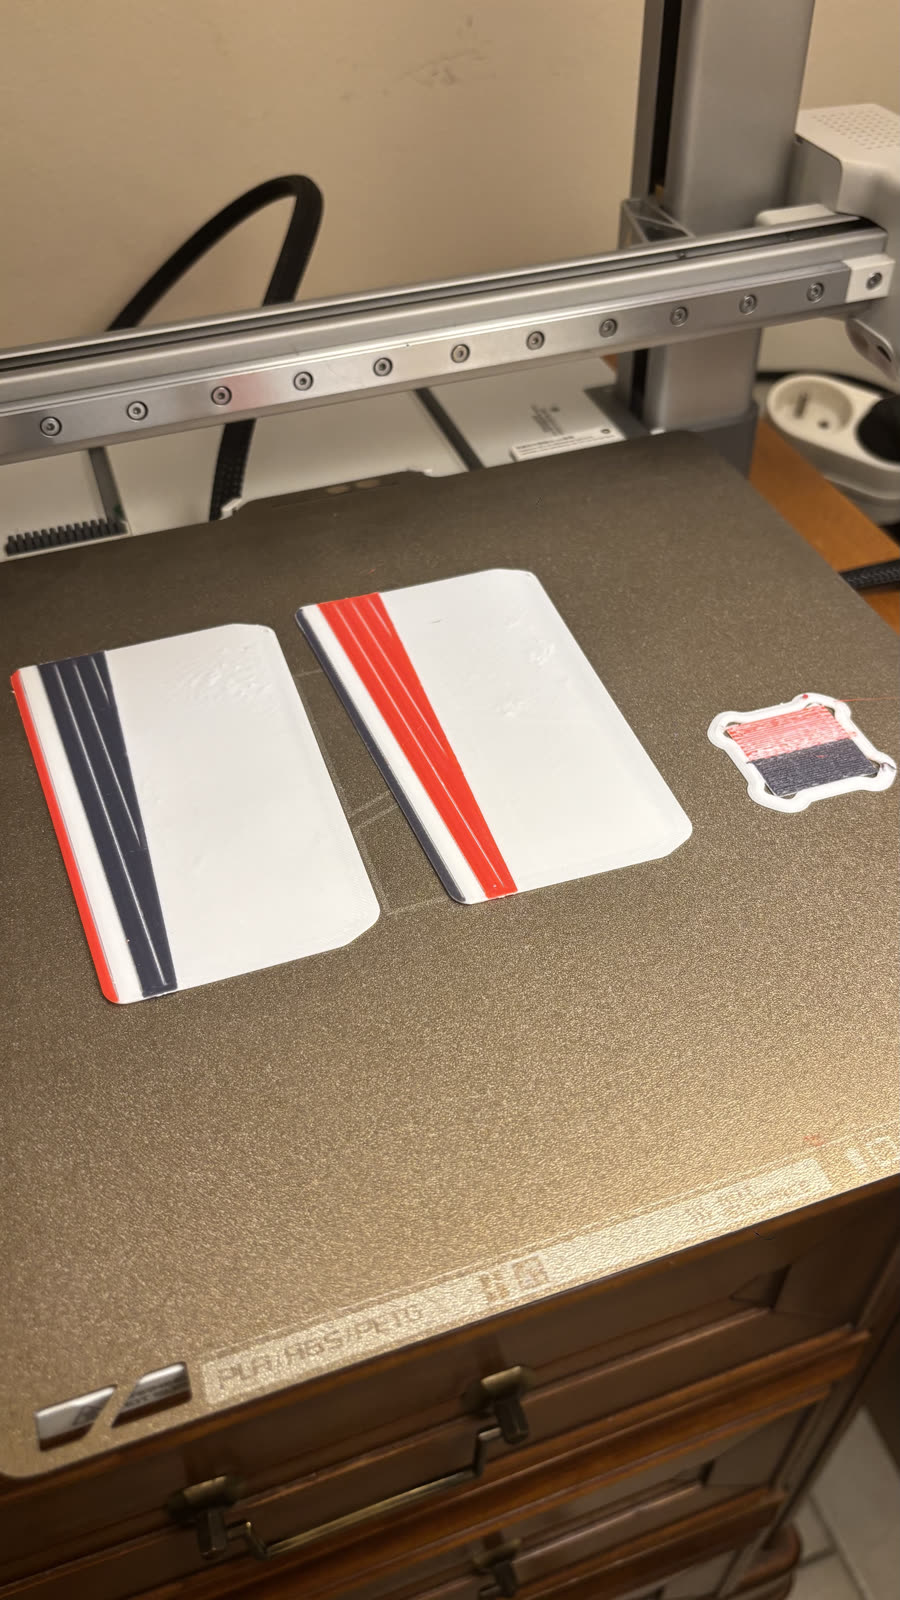
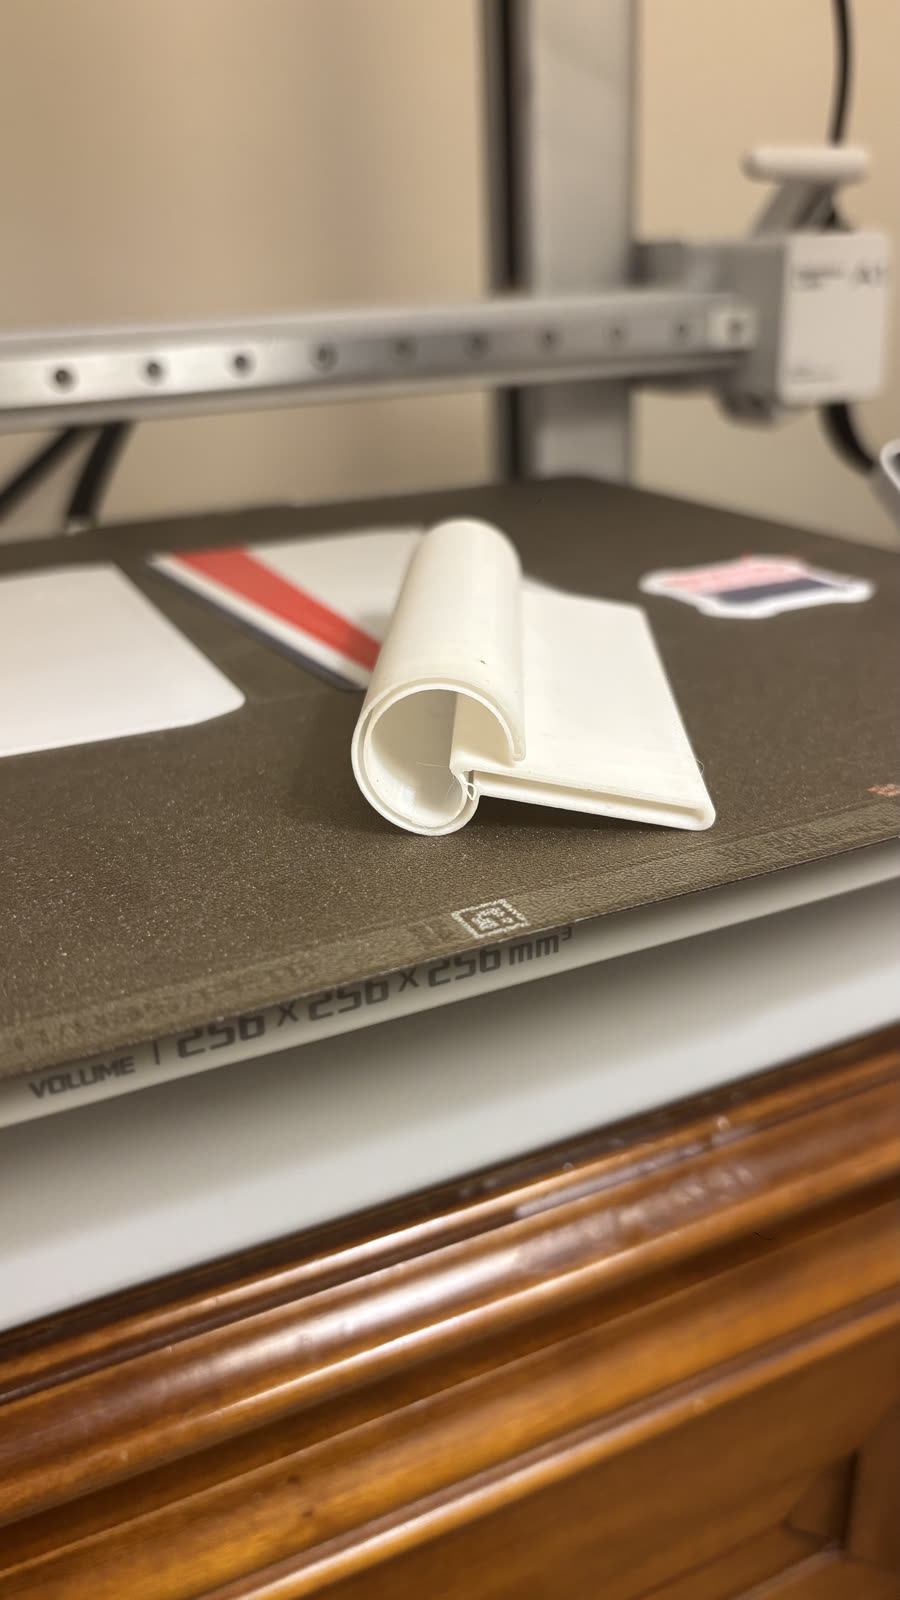
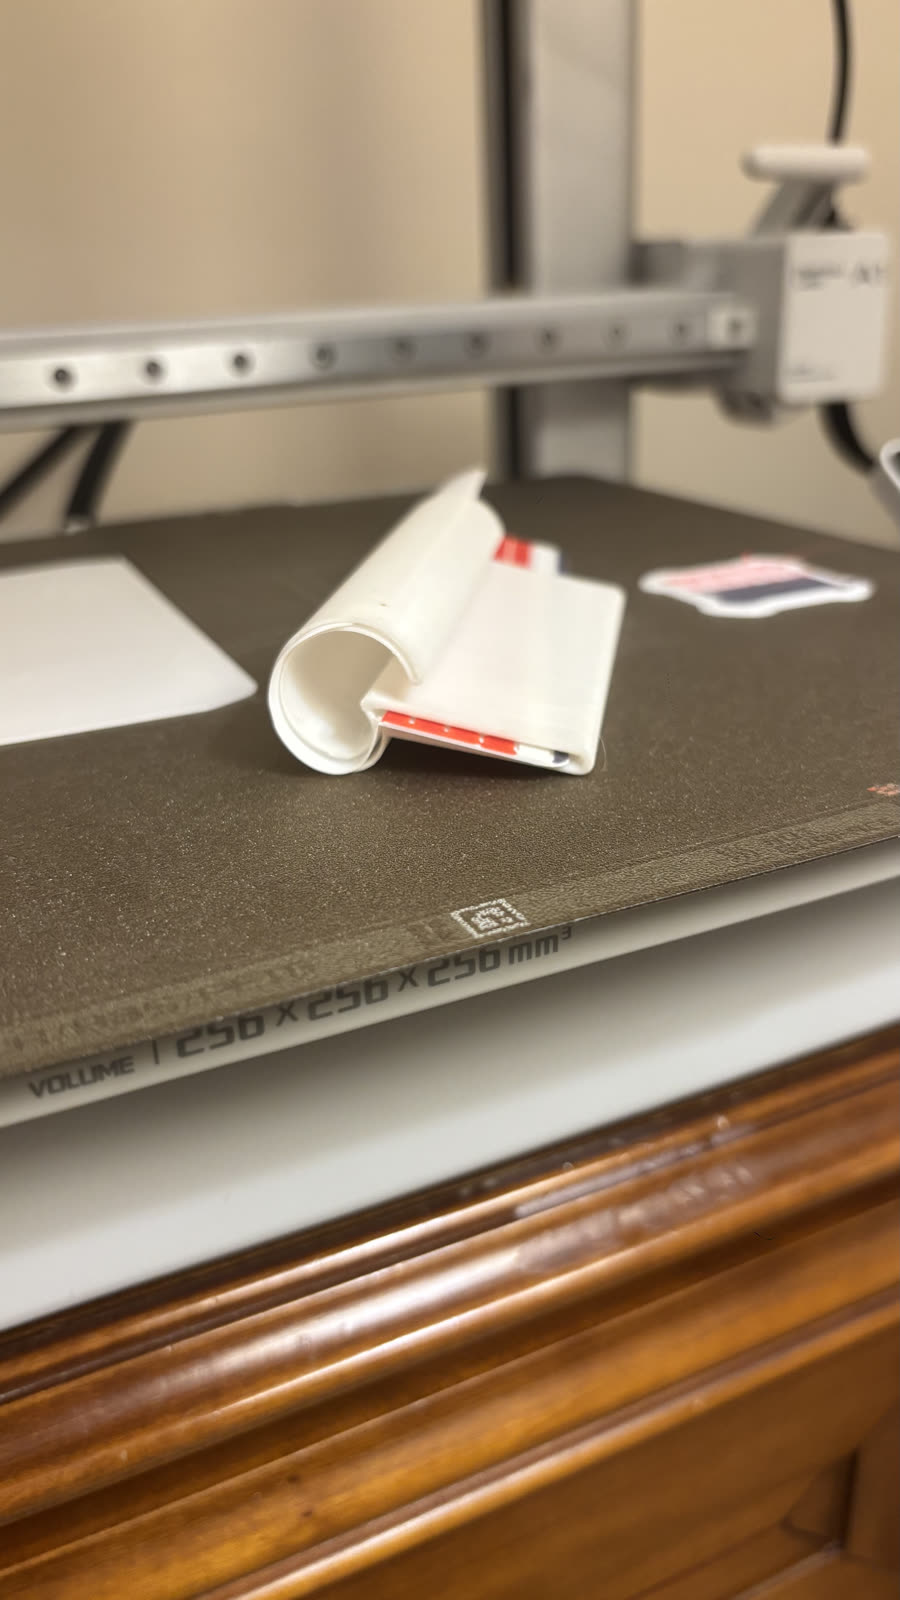
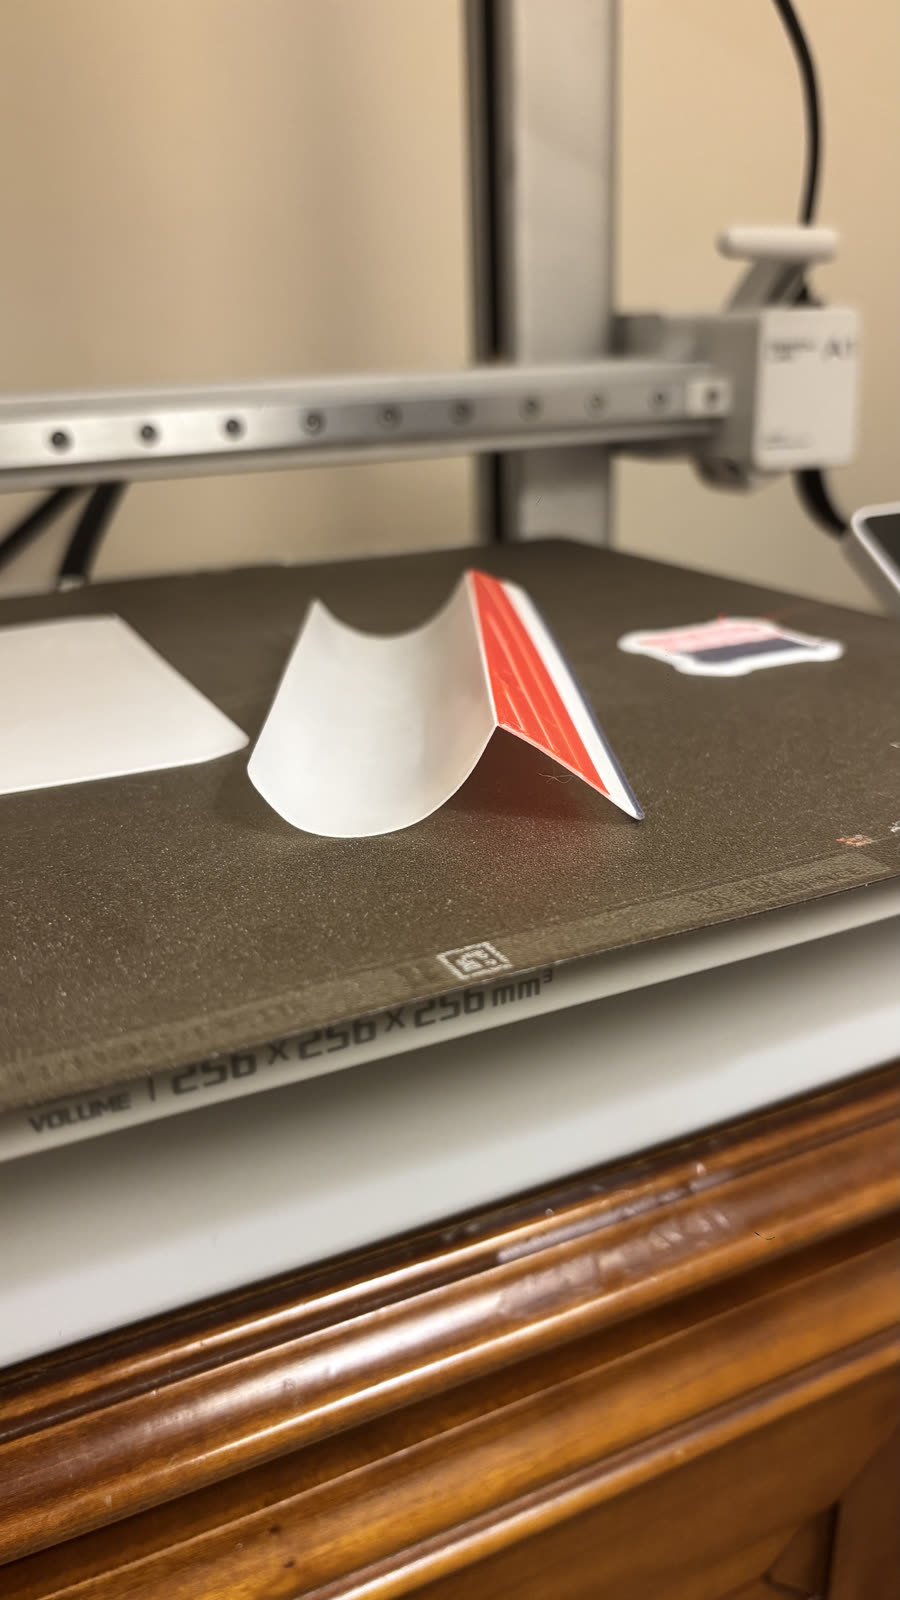
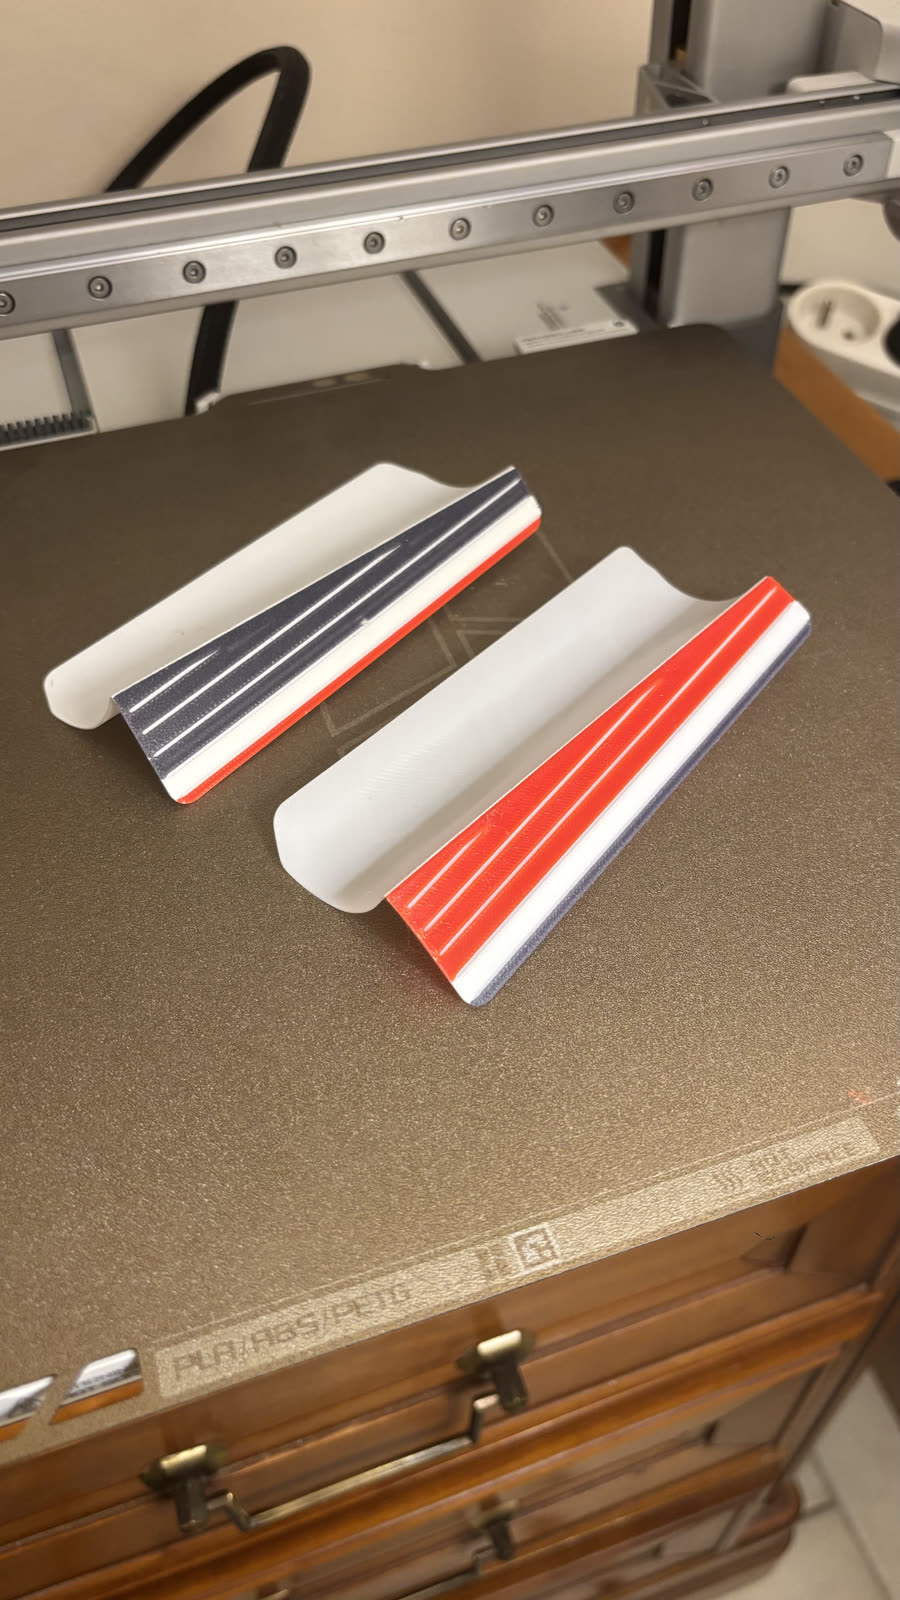
Printing isn't always the end of the story: I also “play” with the material itself. Thin parts that need a curve, like the tongues, come off the build plate flat — and while they're still hot, I give them their curve on a jig, before they cool down. The tongue is a thermoformed part.

Step 1: printing the tongues flat, build plate heated to 70 °C (158 °F)
1. Printed flat — build plate held at 70 °C (158 °F) to make shaping easier.
Step 2: the jig that gives the tongue its proper shape
2. The jig I created to set the proper shape before the part cools.
Step 3: the tongue placed in the jig
3. The tongue in the jig.
Step 4: the curved tongue
4. The tongue, curved.
Step 5: the two curved tongues
5. Both tongues curved and ready.
The handwork

Prep work — the invisible labor in every box.

Once the build plates are done, the longest part begins: removing the supports one by one, deburring, cleaning, checking, sorting. And on the Premium boxes there's goldsmith-level work on top: gluing the small drawer parts one by one and setting every magnet. For a single Premium Box, ≈ 3 h 20 min before assembling anything at all.

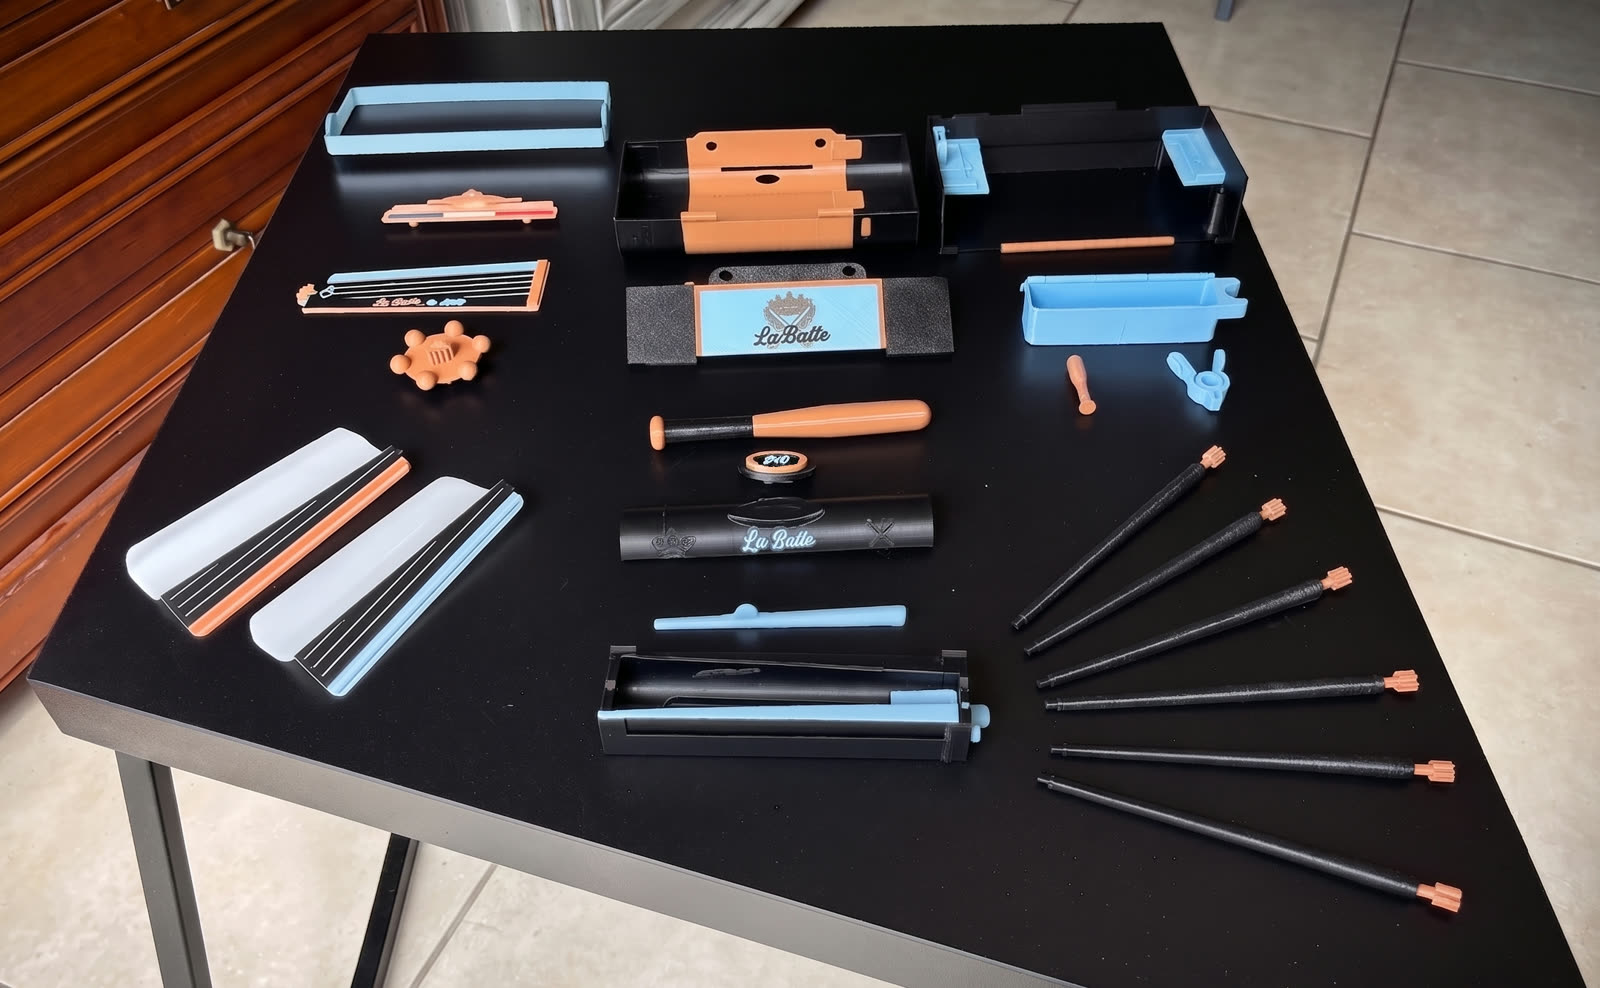
A Premium Max Box fully disassembled: every part to be prepped, glued and assembled by hand
A Premium Max Box fully disassembled — every part passes through my hands before assembly.

Removing the supports, one by one

The most tedious step: peeling off the supports without damaging the surface. I take the time it needs — it's the difference between a part “fresh off the printer” and a finished part.

It's also what I hope to cut down drastically with the new machines: dedicated heads and materials designed for clean release, supports that practically detach themselves.

Supports that come off easily

With machines and materials designed for clean release, supports detach cleanly — those hours spent removing them one by one melt away.

Multiple print heads

Dedicated nozzles per color drastically reduce purging between shades: far less wasted material, and less cleanup by hand.

Production times slashed

Machines running in parallel, day and night, on the right profiles: production time per box drops sharply, without giving an inch on finish.

The target, in numbers

Today, it takes far too long. Tomorrow, it changes scale.

At this pace, a consumer machine produces less than one box a day. Fine for a living-room workshop, not for 1,000 orders. The goal with the new multi-head fleet is clear:

⏳ Today
Less than 1 box / day

On one machine: ≈ 31 h of printing + ≈ 5 h of handwork for a single Premium Box. The lead times are, frankly, far too long.

🎯 The target
15 to 16 units / day

Printed and prepped within the day, thanks to the multi-head fleet funded by the campaign. Supports that detach cleanly, reduced purges, machines running in parallel.

It's a working target, not a promise set in stone: it depends on the final fleet and the tuning. But that's the course — and everything on this page is built to reach it.

The scraps I keep

Everything the machine spits out — and that I keep.

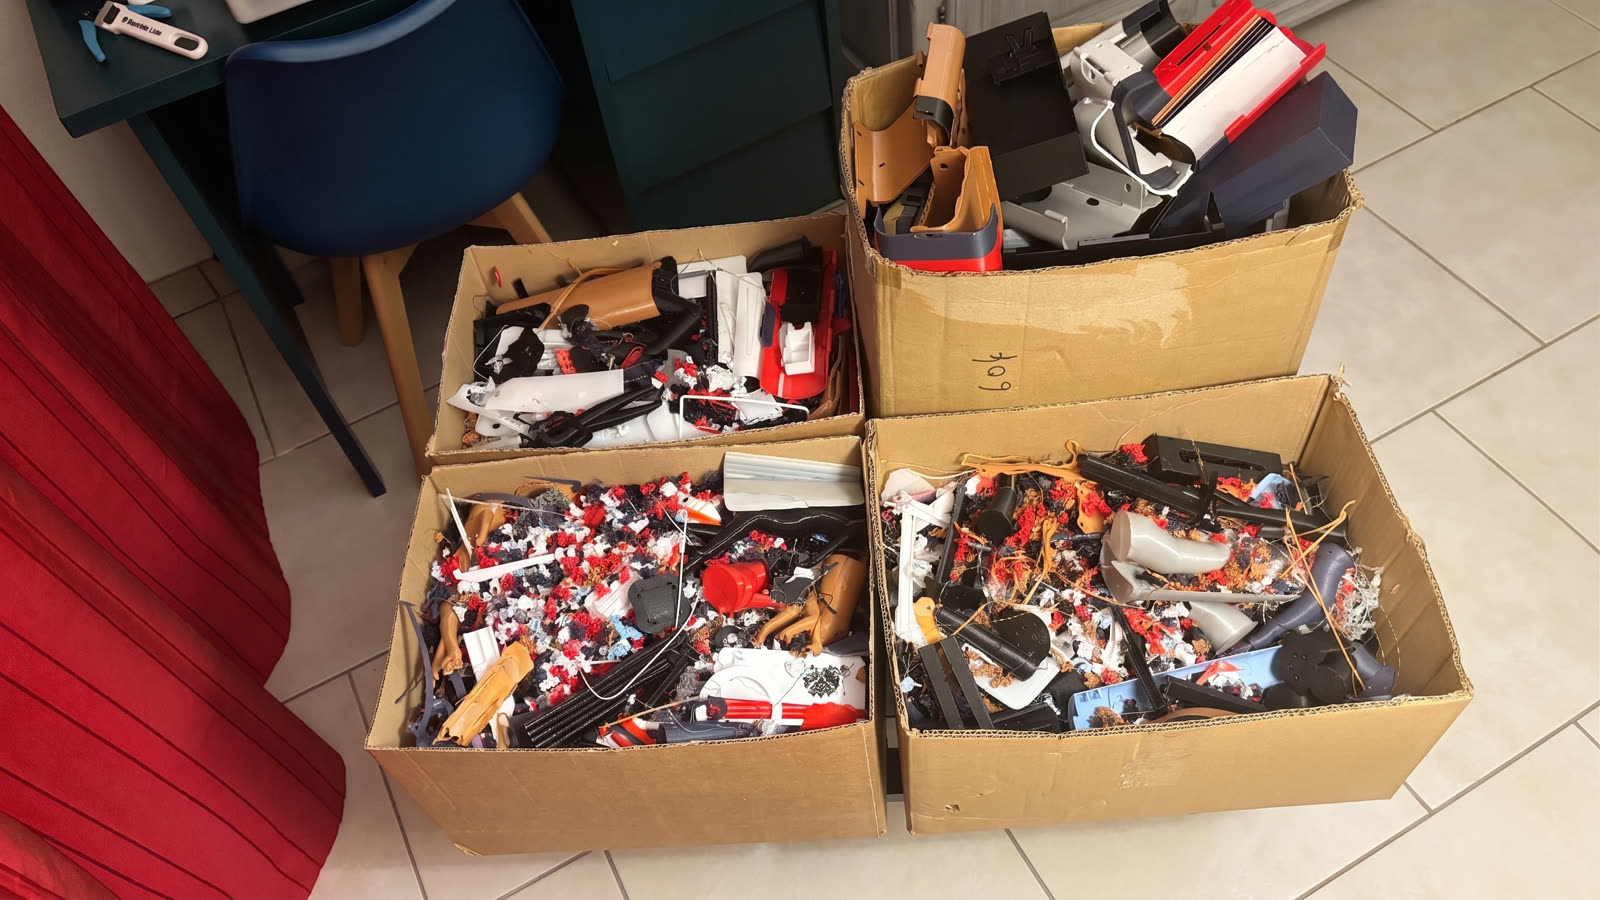
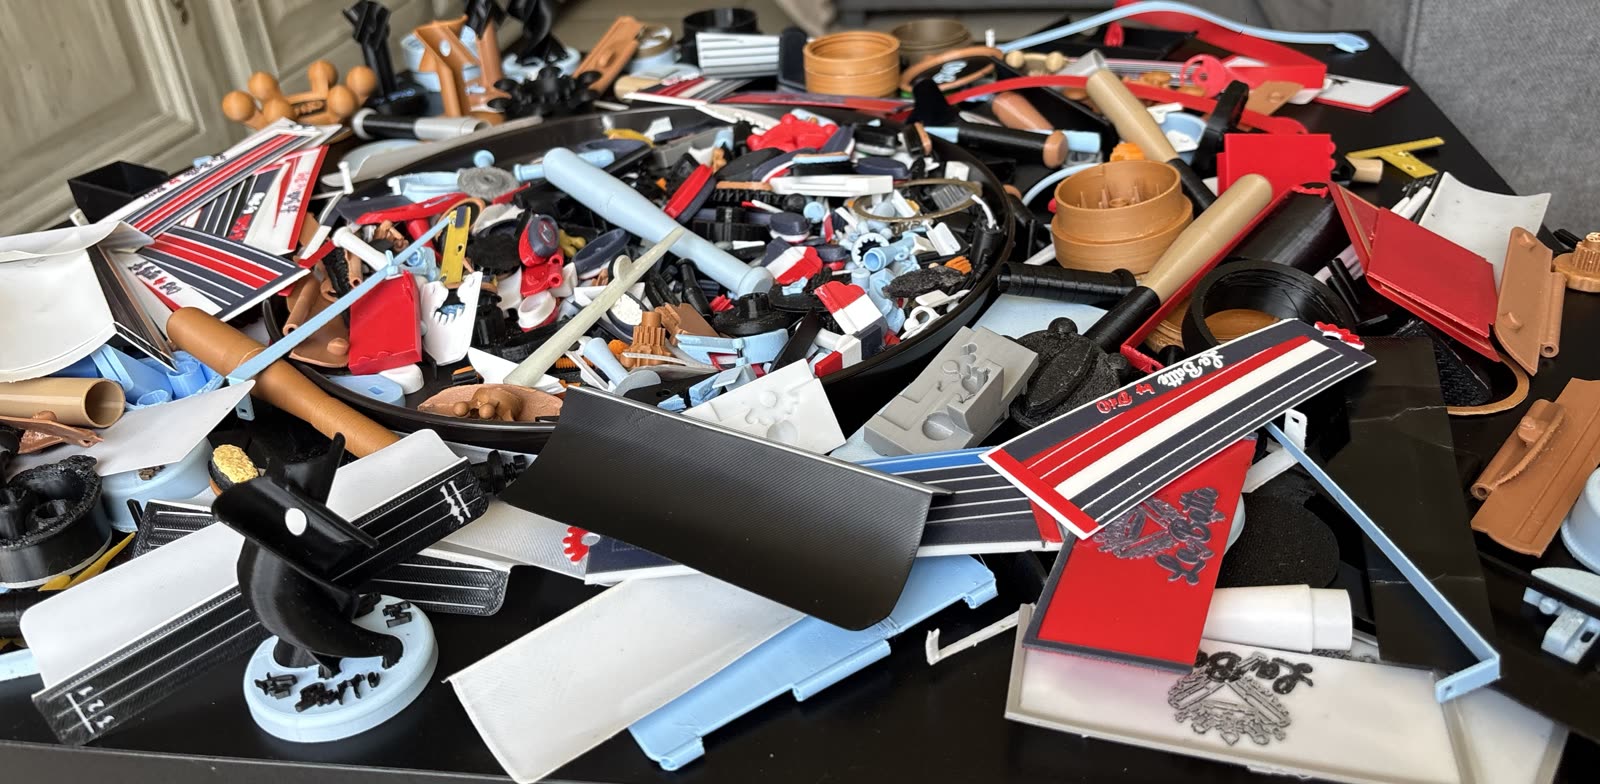
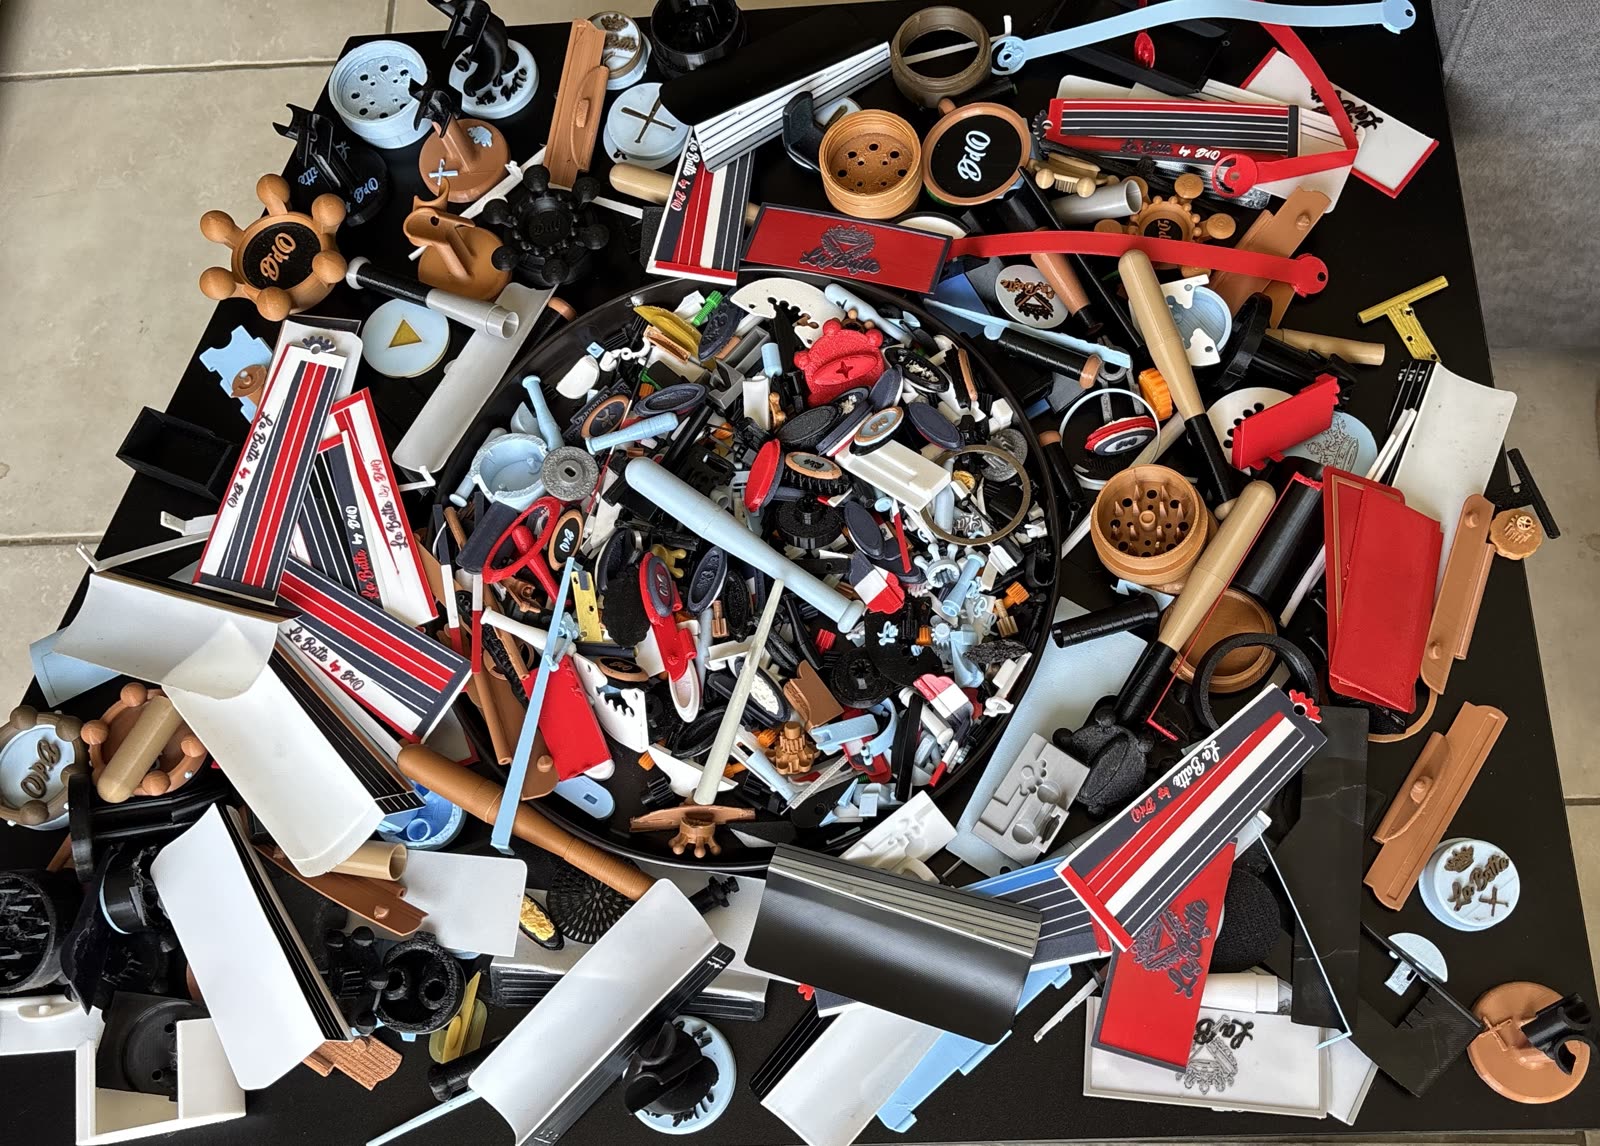
A 3D workshop also produces waste: failed parts and multicolored purge blobs. Most people throw them out. I keep every single one — with a precise goal in mind.

My goal: waste nothing for good

That surplus — supports, purges, failures — isn't lost: it's raw material in waiting. My aim: grind it, remelt it, turn it into fresh filament. Hence the sorting and labeling, rather than the trash.

My one regret: only starting to keep everything in January. But it already fills several whole bins.

Kept and sorted since January

Not one failure, not one test, not one purge thrown away. Several bins of technical plastic, sorted and labeled, are waiting for a second life.

The plan: a shredder, to make filament again

A machine that grinds the scraps, remelts the material and re-extrudes it into fresh spools. Estimated cost: €3,000–5,000. A post-campaign priority — the workshop would become nearly self-sufficient in material.

The multicolored purge blobs I keep — the famous “droppings”
And one day: taking back your Roller at the end of its life

Eventually, I want to open a take-back program: you send me your Roller when it's no longer in use, I grind it down, make new filament, and the material goes around again. Indicative timing: after the 1,000 boxes are delivered (schedule detailed in September 2026). It's an intention, not a dated promise yet.

A workshop confession — choosing the colors

Color cost me months of testing: many filaments compared to keep only the highest quality. For the blues alone, five or six shades before settling on my pastel (imported from the United States) and my navy. As long as production stays artisanal, the collections will live in limited quantities and will change — and one day, maybe, your box in custom colors.

The tour

This all happens right here.

For now, my research-and-development workshop fits inside my living room. Rotate the scene, zoom in, and click one of the four corners — design, printing, testing, display — to see what goes on there.

The archives

How the parts evolved — and everything that's not on offer yet.

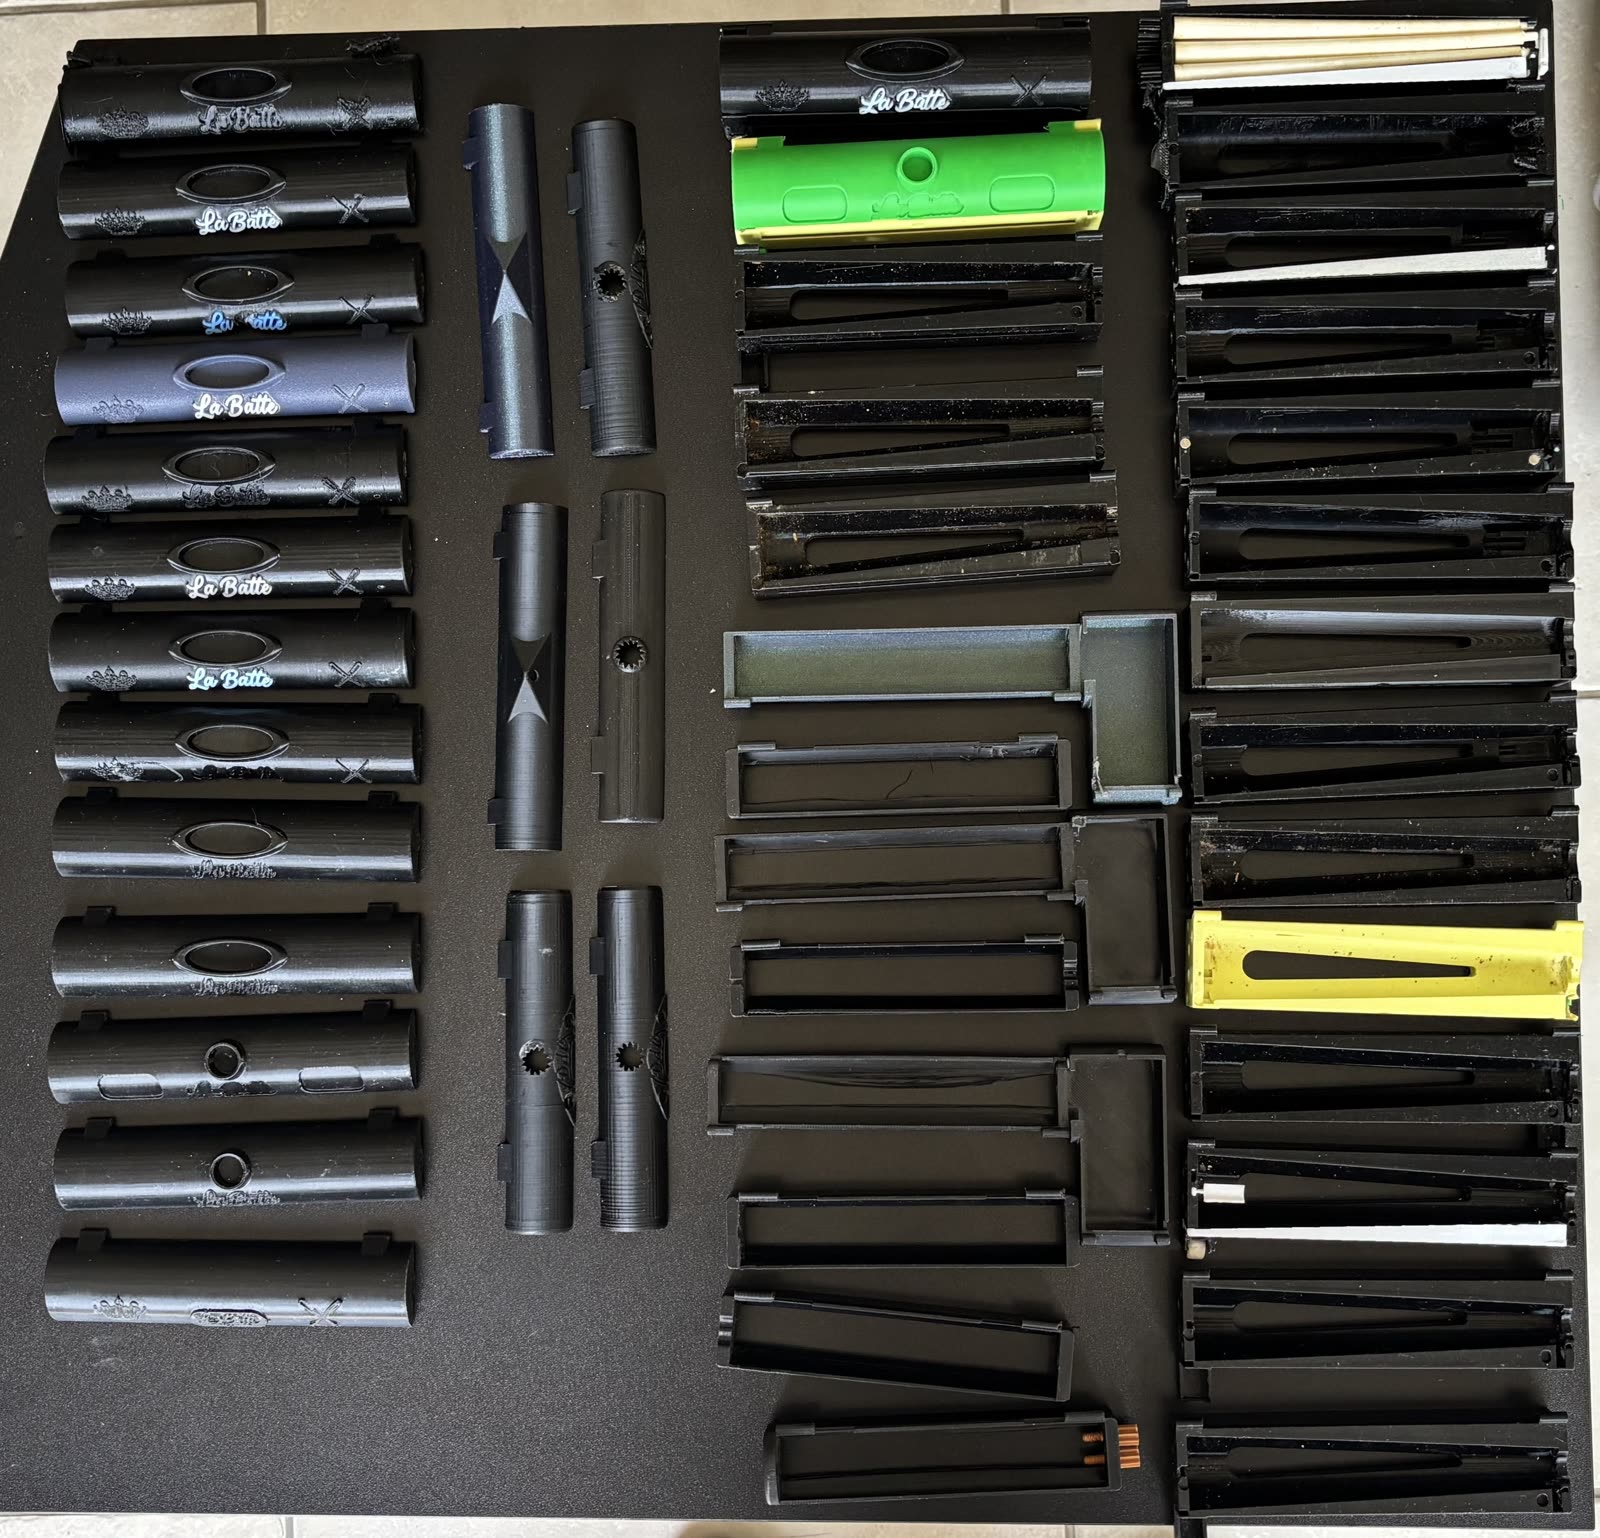
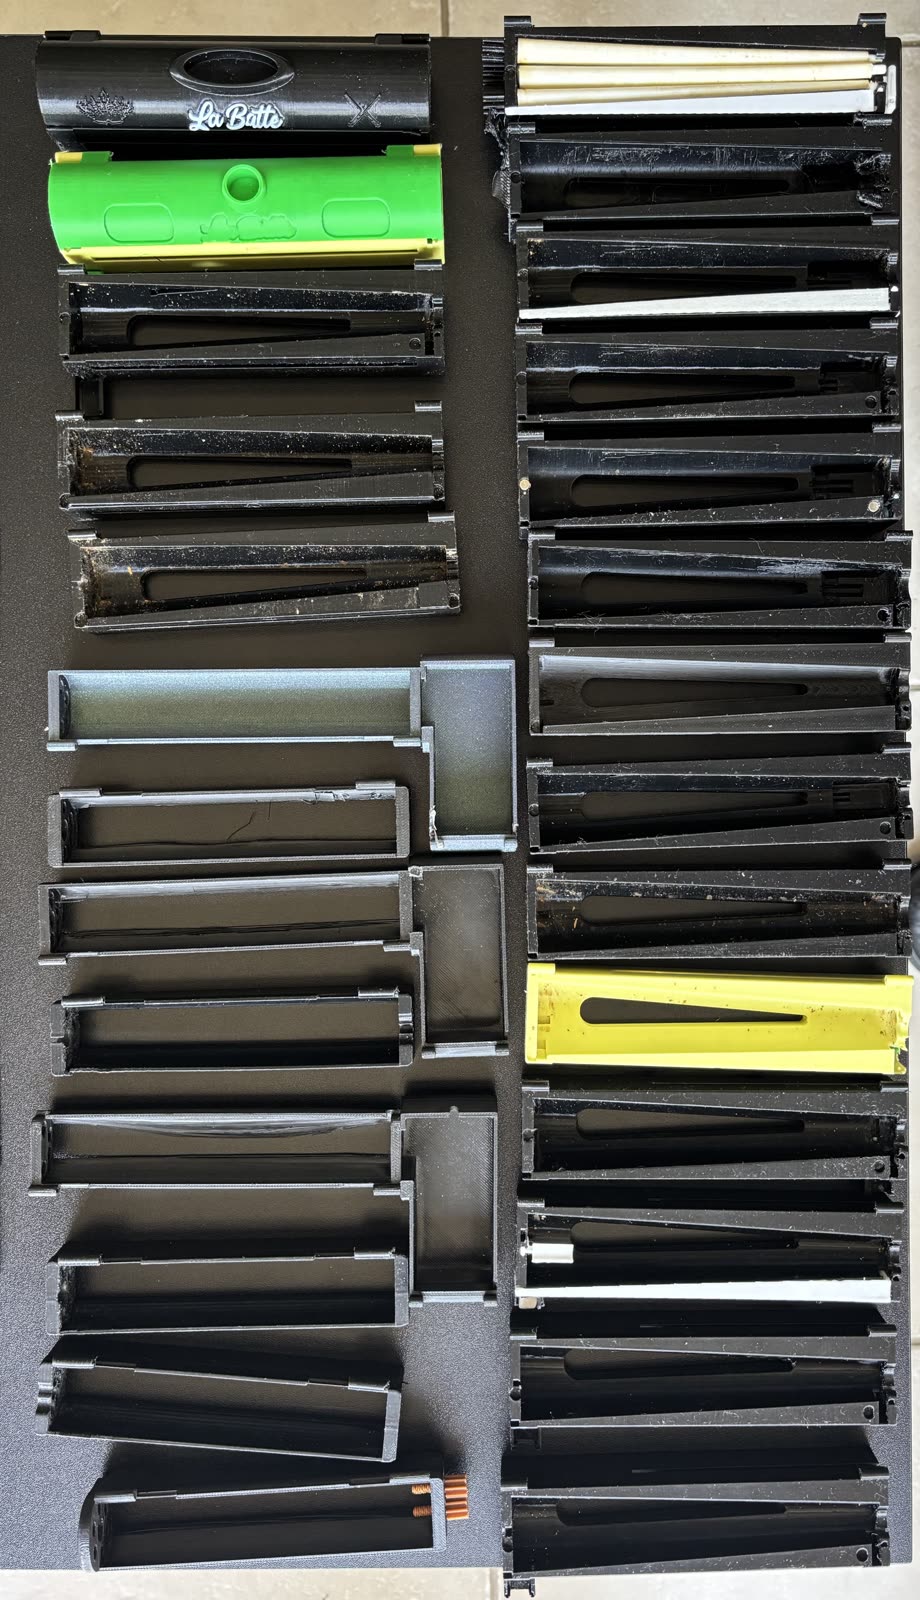
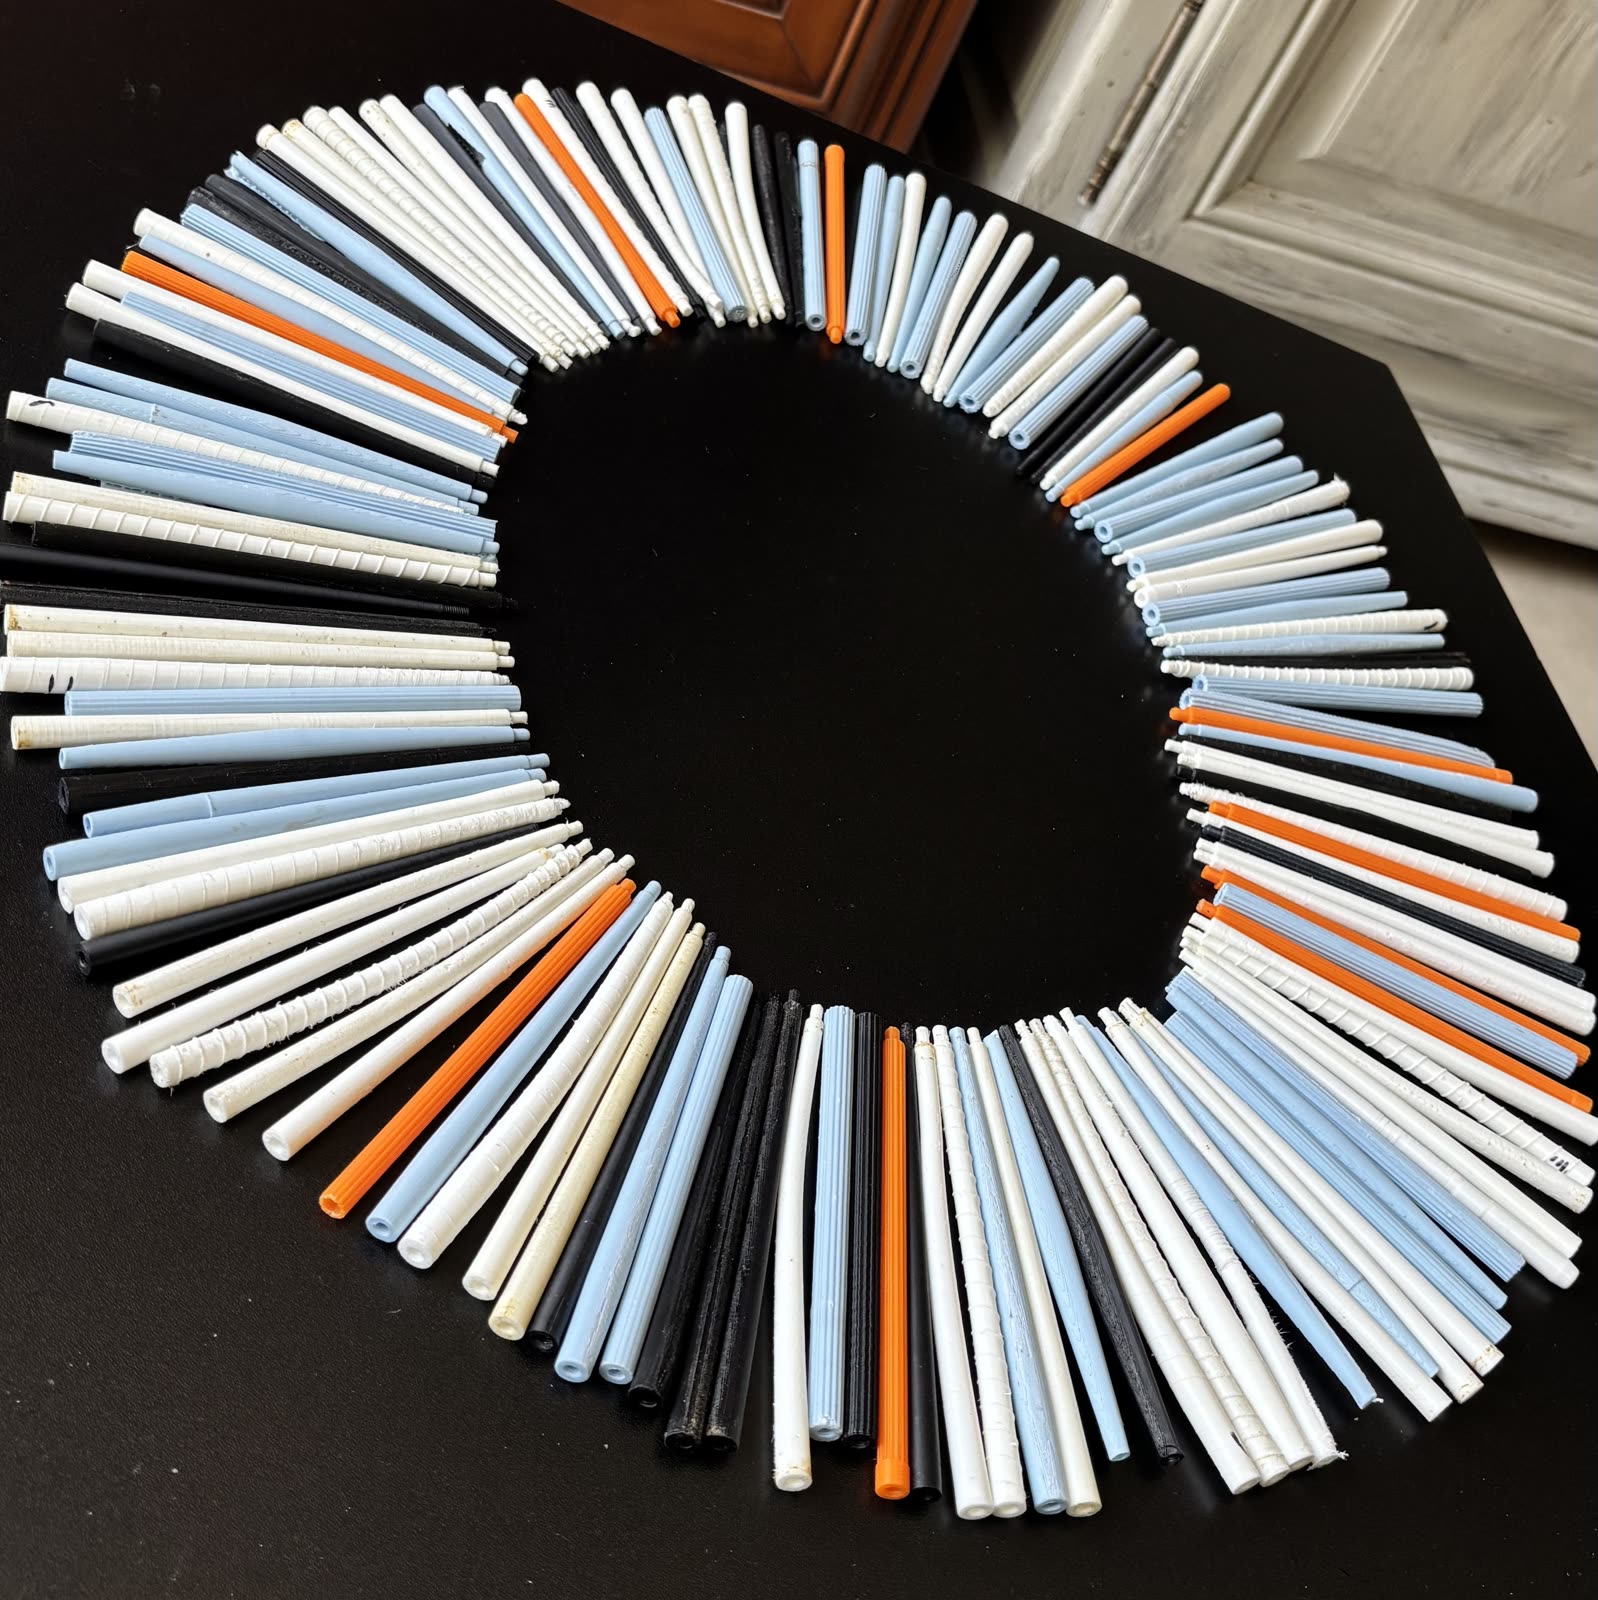
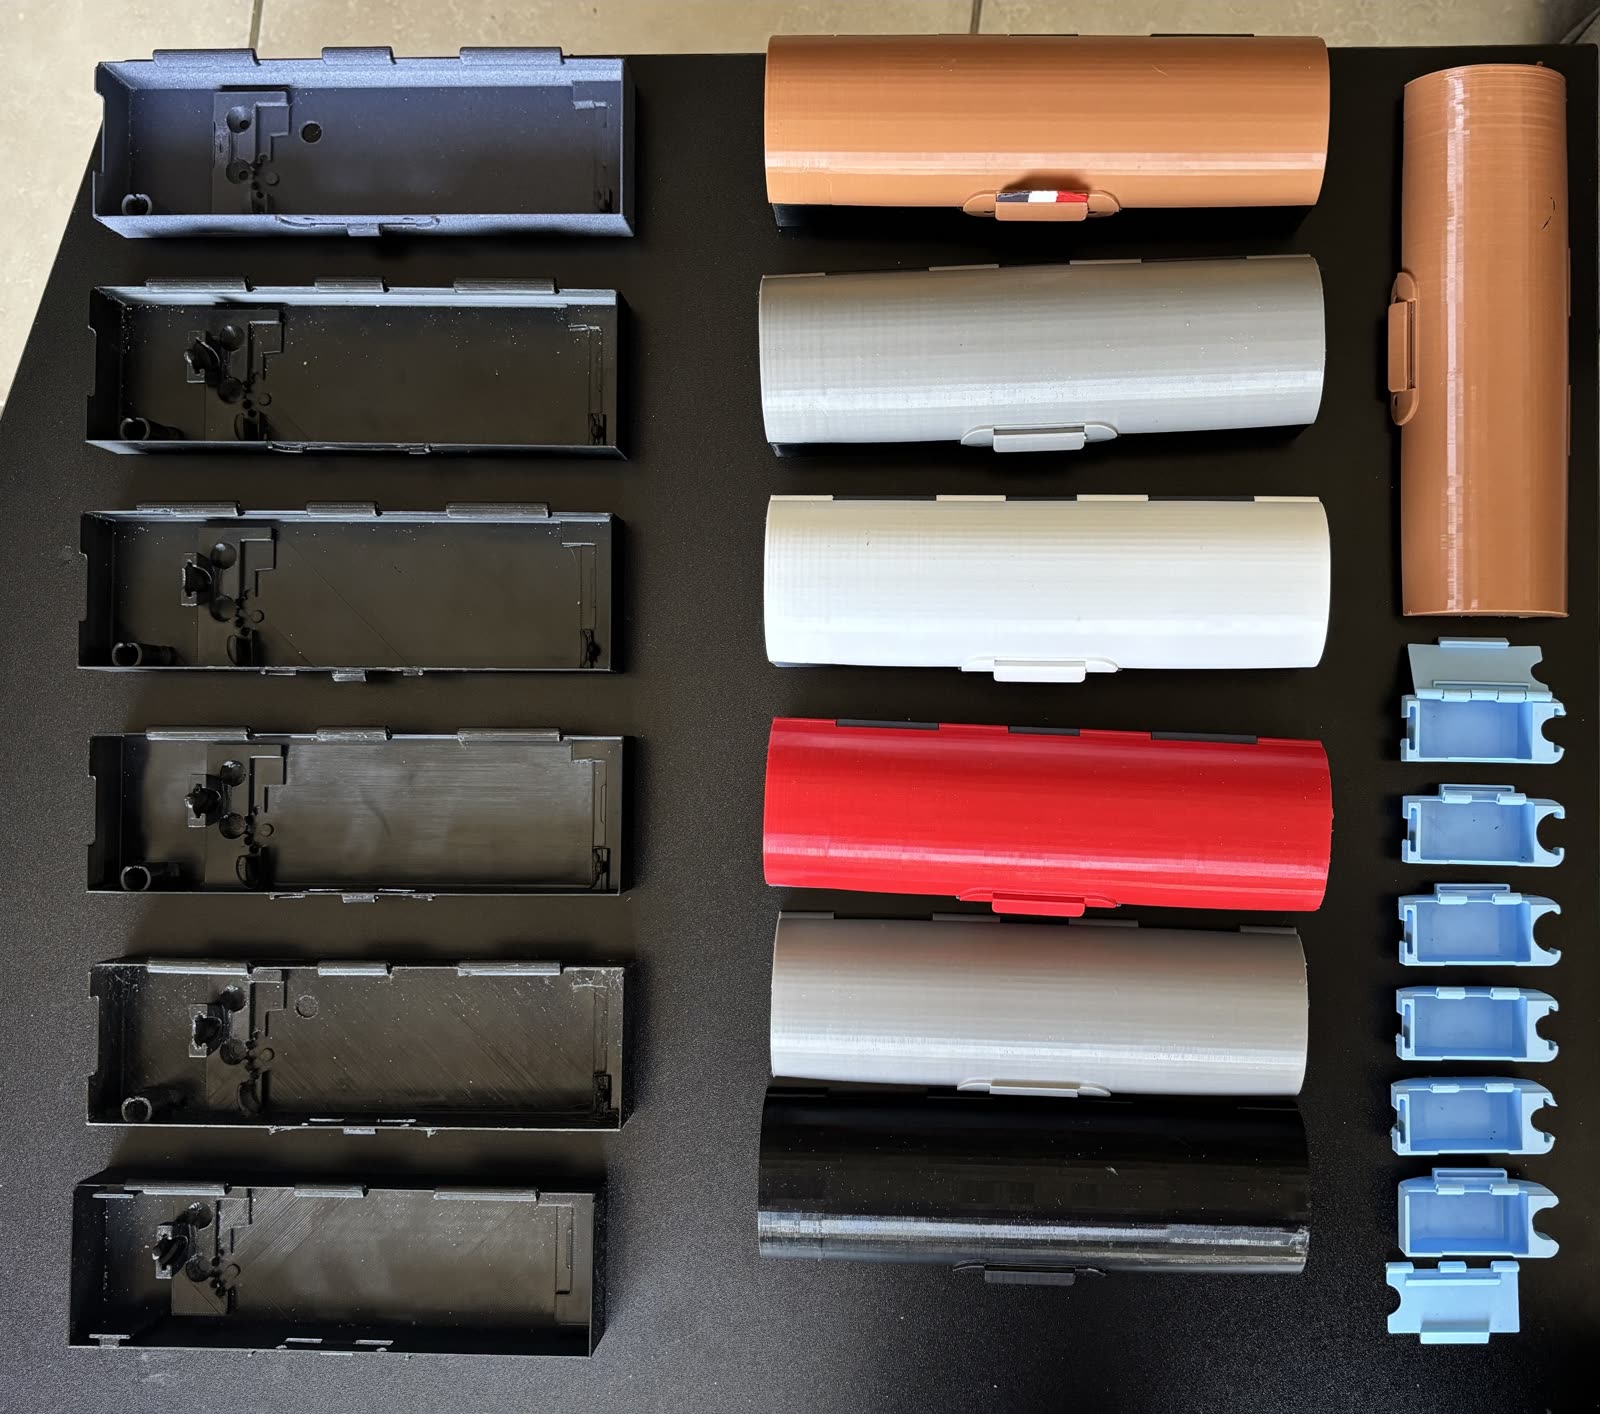
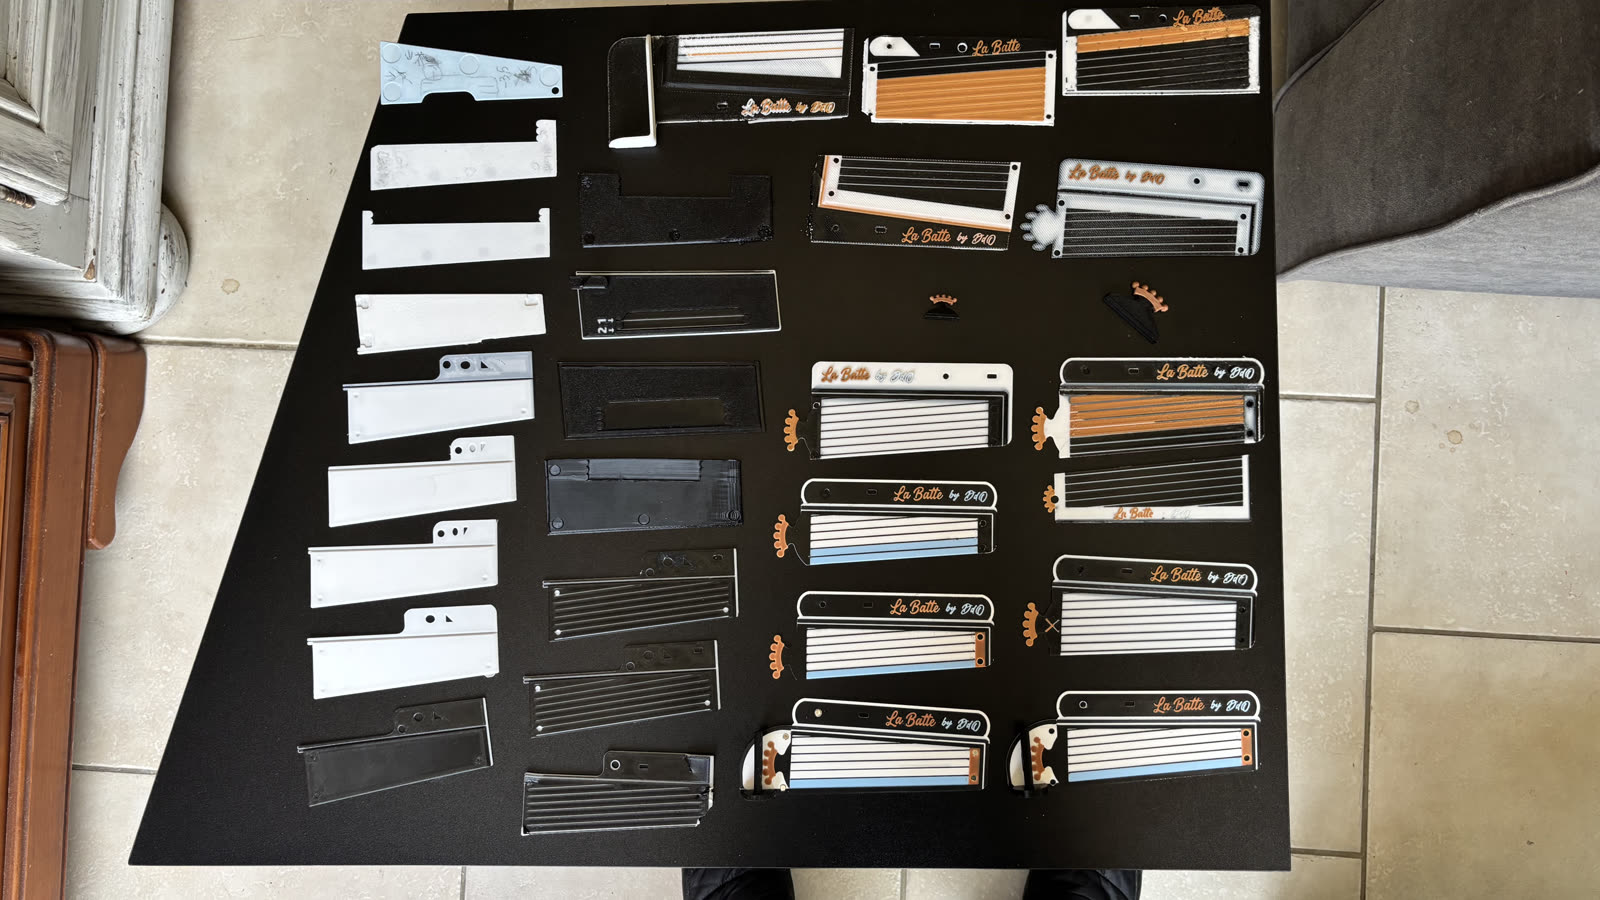
Today's Roller is dozens of versions of every part. With each print, a tenth of a millimeter adjusted, a better-balanced rod, one less point of friction. Nothing was thrown away: the workshop's memory, and the proof of the work.

Archives: several successive versions of the Roller Archives: close-up of the Roller versions lined up

The Roller, version after version

From one model to the next, the object gets refined to the tenth of a millimeter: the rod/shell balance, the clearances, the finish.

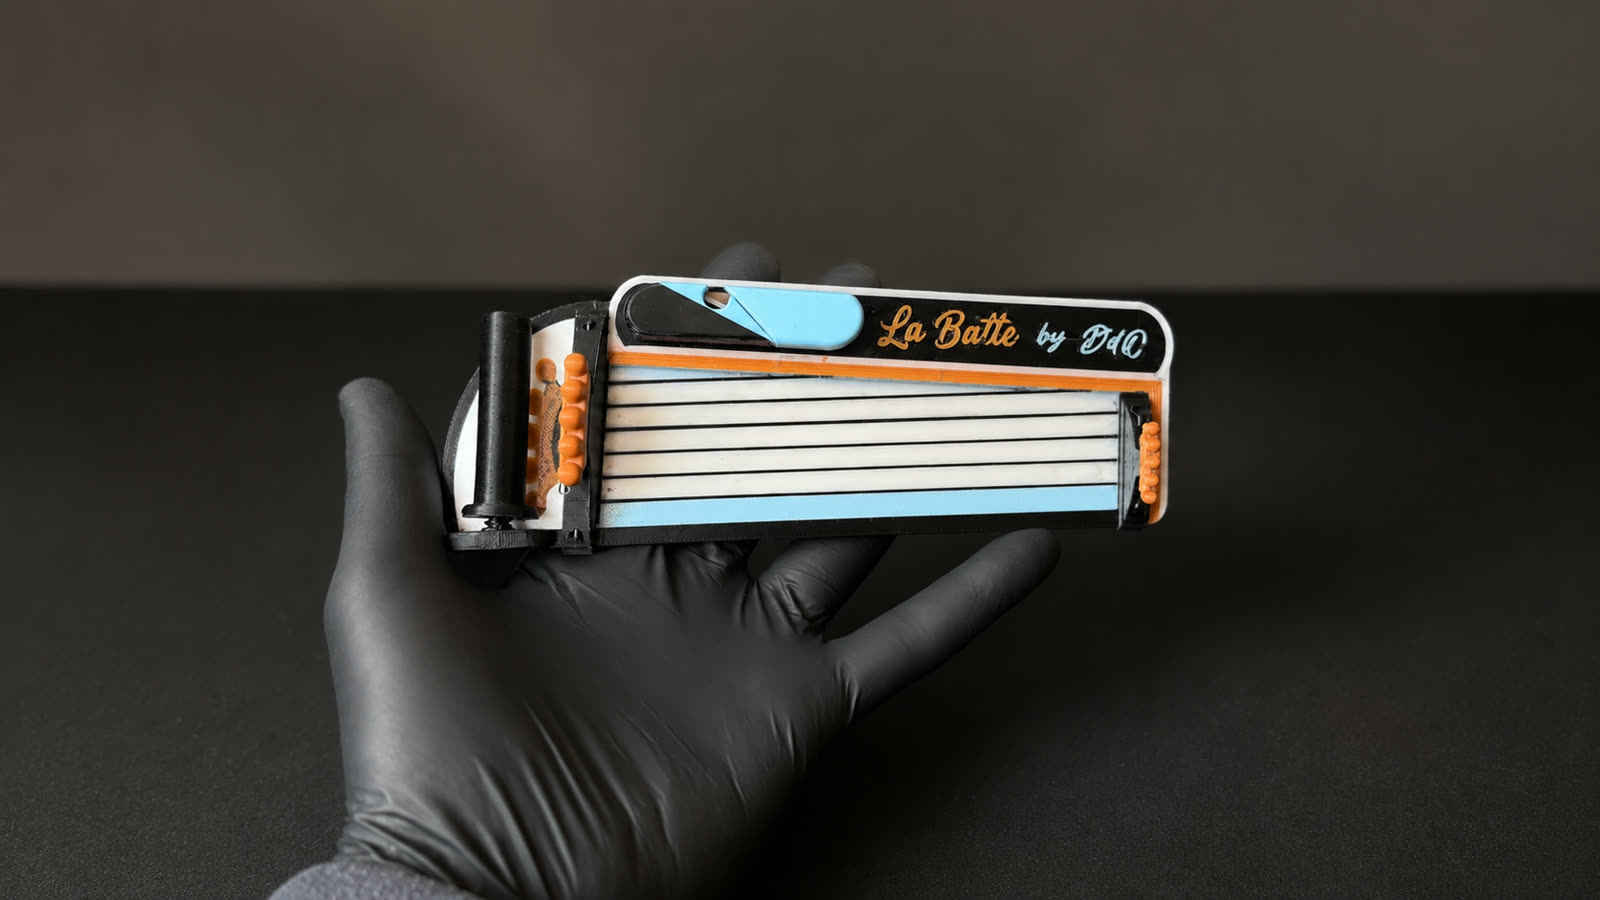
The rods

The part that took the most trials: dozens of different shapes, materials and designs before finding the perfect form.

Archives: the test versions of the rods
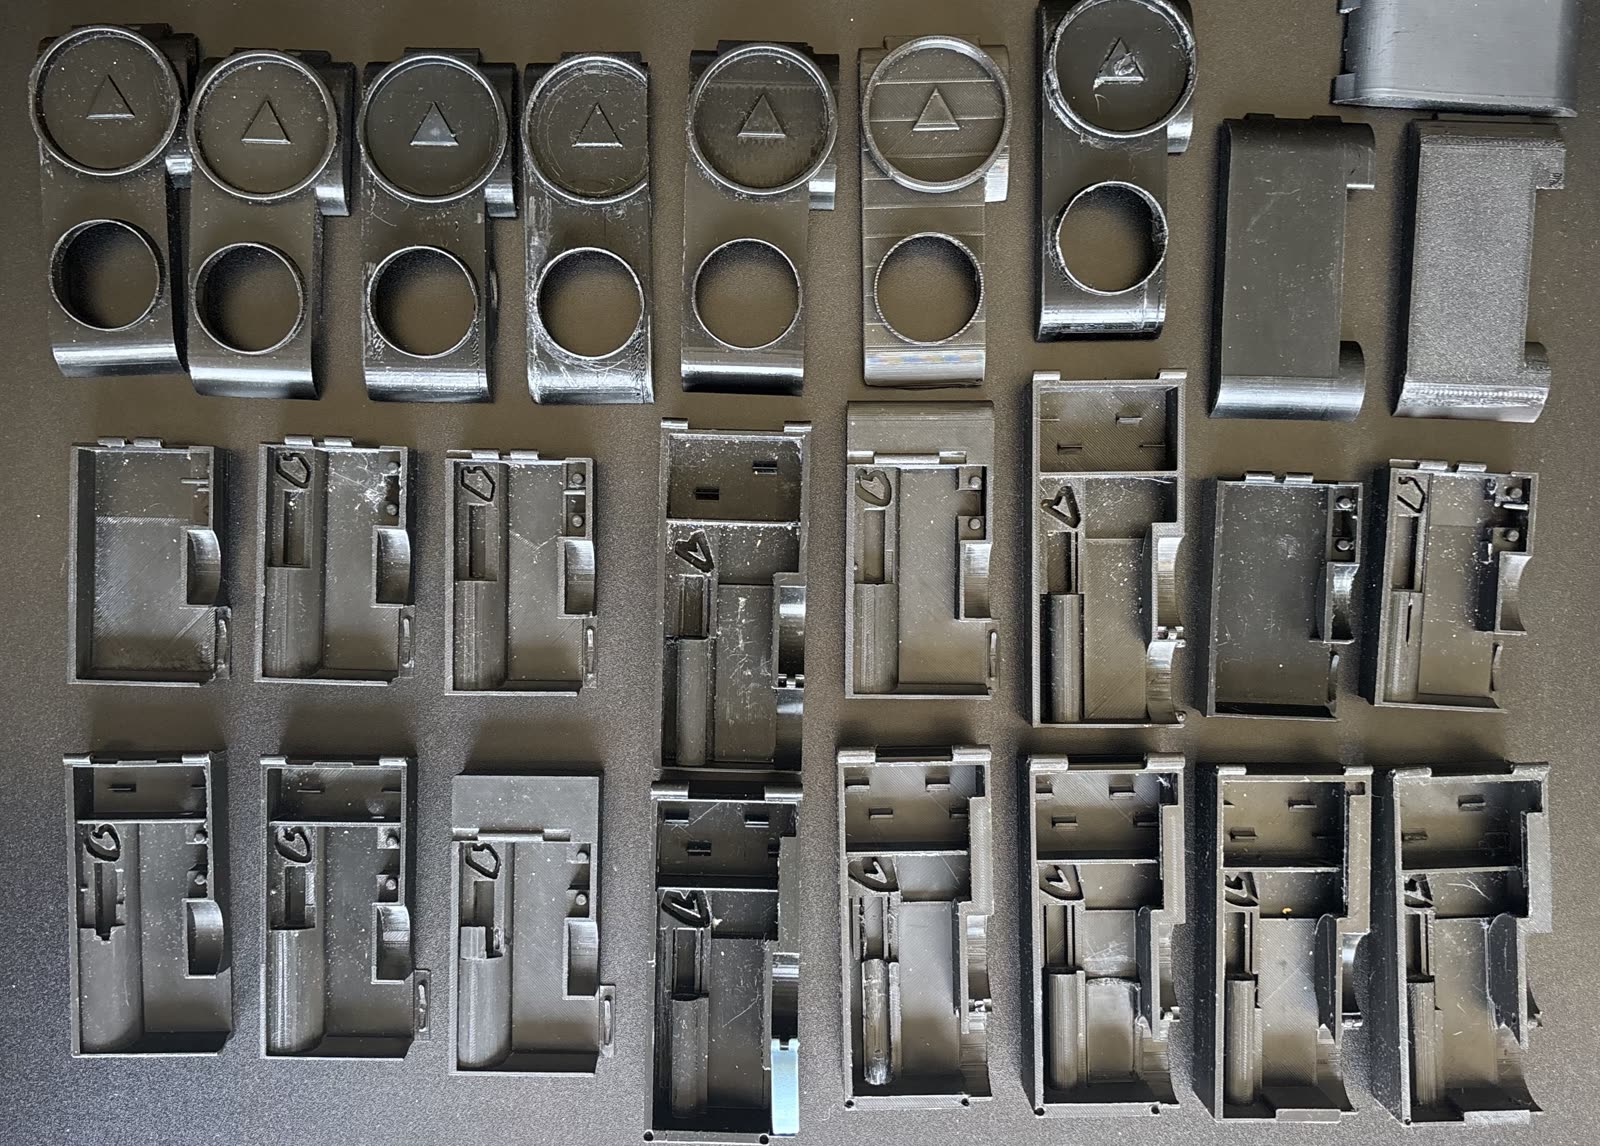
Archives: small test parts of the Roller Archives: how the small parts evolved

The small parts

Hundreds of small parts, their shape, function and dimensions adjusted trial after trial — down to the perfect combination.

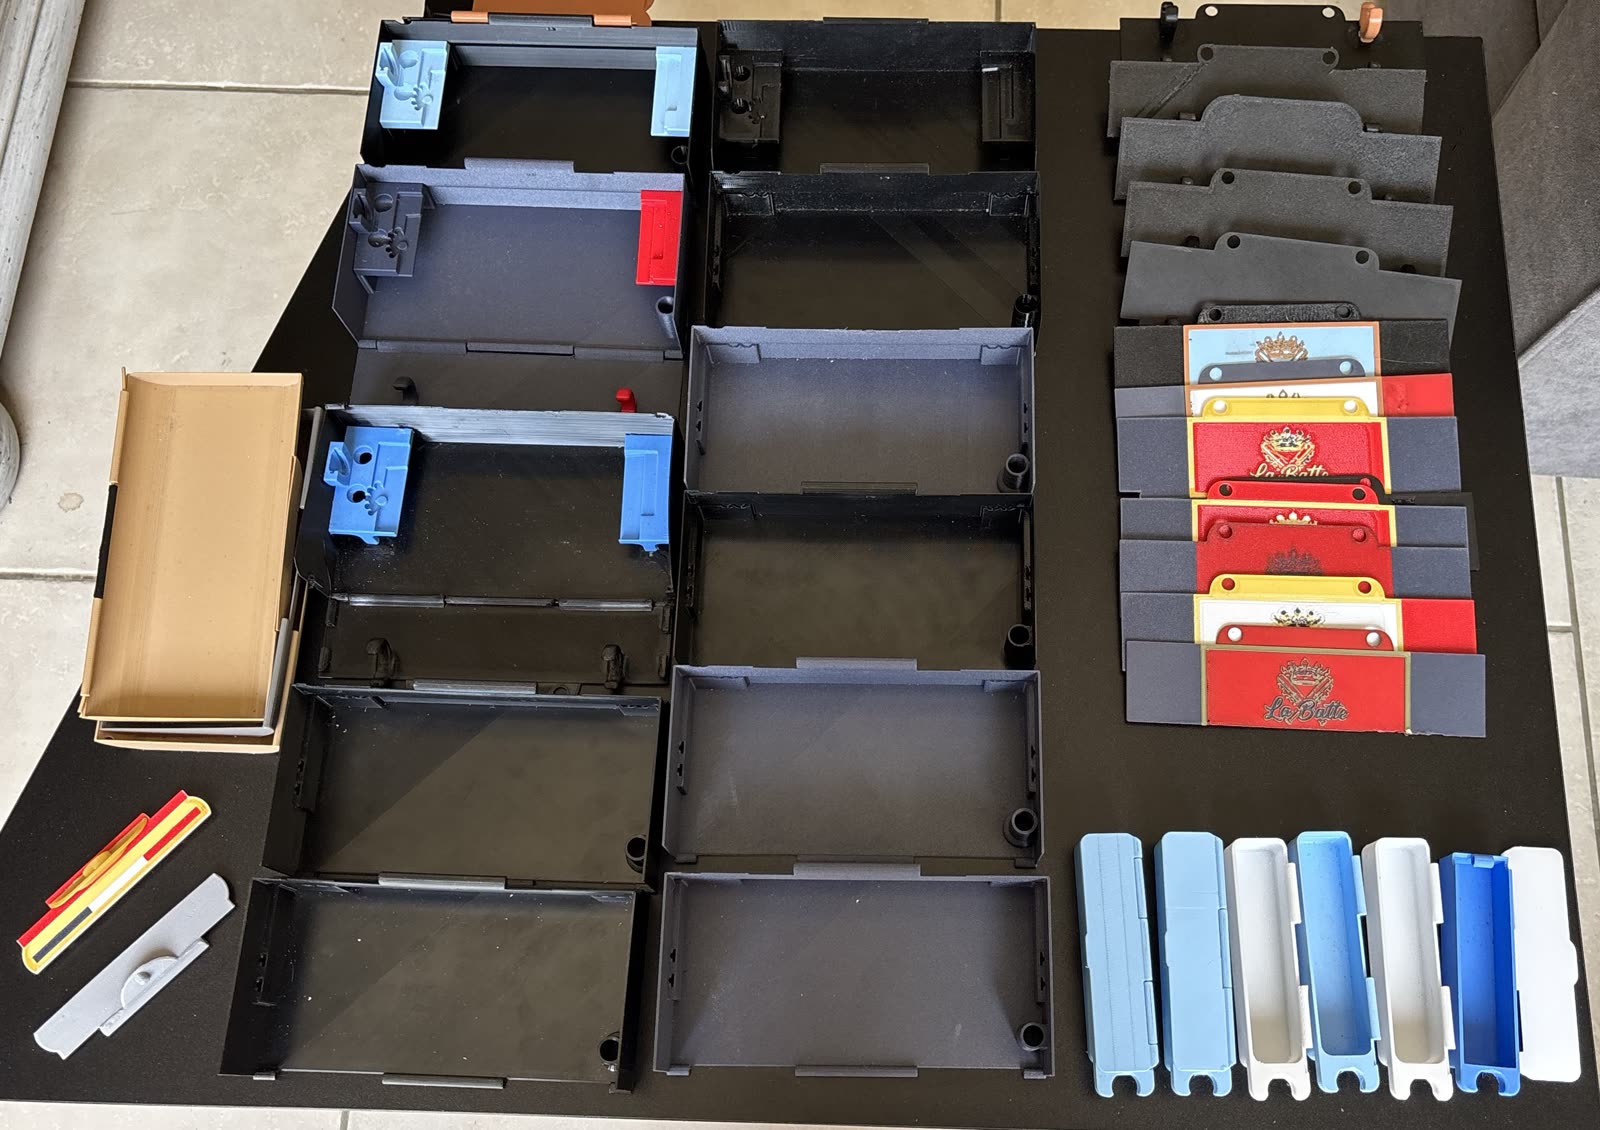
Archives: prototypes of the Premium Box case Archives: prototypes of the Premium Max Box case

The case prototypes

Once the mechanism was dialed in, the container remained: dozens of configurations tested to combine practicality, looks and resistance in transit — and guarantee an optimal delivery.

Months of work already in

Parts I've already spent months on — not for sale yet.

Months of research and development, not yet offered to the public. A sneak preview, in archive footage:

The Premium Station motor

The Premium Station is a motorized home object (not a box). Its motor took many test versions — a project already well underway, which I'll unveil in due time.

Archives: test versions of the Premium Station motor
Archives: the technical Sizing Gauge in development Archives: test prints of the technical Sizing Gauge

The technical Sizing Gauge

A more advanced version of the Sizing Gauge, to push precision even further. Dozens of test prints are sleeping in my archives — still maturing, but the work is there.

A wink for the road: my own Roller is older than all of these prototypes — it's the one I used for all my testing, and it still works as smoothly as day one.

To wrap up

A workshop that keeps improving — and that I share.

That's the view behind the scenes: dozens of prototypes, constraints I own up to, kilos of material kept, and numbers I don't dress up. A workshop in motion, set to grow with this campaign.

If you're into the behind-the-scenes, let me know: I might make videos of the workshop as it evolves — the machines arriving, the setup, the day-to-day. Nothing promised, nothing dated, but it's exactly what I would have loved to find when I was starting out.

All of this moves forward thanks to the first 1,000 boxes. Will you be part of it?

Preorder my box · from €29 Notify me at launch
Premium Box · €39
Preorder July 2026
1,000 pieces · numbered
Sign up to be notified
Preorder Notify me